Usage of Open Access Computer Image Editing Software (Adobe Photoshop) in Forensic Dentistry
Kusum Singal1, Neelkamal Sharma2* and Preeti Narwal3
1Senior Research Fellow (SRF), Department of Genetics (Forensic science), Maharshi Dayanand University, India
2Assistant Professor, Department of Genetics (Forensic science), Maharshi Dayanand University, India
3MSc. Student, Department of Genetics (Forensic science), Maharshi Dayanand University, India
Submission: February 06, 2018; Published: February 19, 2018
*Corresponding author: Neelkamal Sharma, Assistant Professor, Department of Genetics (Forensic science), Maharshi Dayanand University, India, Email: kusumsinga1731@gmail.com
How to cite this article: Kusum S, Neelkamal S. Usage of Open Access Computer Image Editing Software (Adobe Photoshop) in Forensic Dentistry. J Forensic Sci & Criminal Invest. 2018; 7(4): 555719.DOI10.19080/JFSCI.2018.07.555719
Abstract
In the field of forensic dentistry, various image editing softwares are there that can be used for the purpose of legal investigations. Adobe Photoshop is one of them. Many versions of Adobe Photoshop are commercially available in the market such as CS, CS2, CS3, CS4, CS5, CS6, CC, CC2O14, CC2015, CC2017, CC2018, Photoshop Touch etc. This technical report details how a free-to-download and open source software Adobe Photoshop version CS6 and its applications can assist forensic dentists in identification such as age estimation, bite mark analysis, odontometric analysis in living as well as dead. Adobe Photoshop CS6 can be used excellently for measuring area and length of teeth in digital dental radiographs by using tool magnetic lasso and scale respectively.
Keywords: Forensic dentistry; Image editing software; Adobe Photoshop; Age estimation; Digital dental radiographs
Introduction
Age estimation is of broader importance in forensic science not only for the identification purposes ofthe deceased victims but also in connection with crimes and accidents. For age estimation digital approach is better rather than manual approach. The superiority of digital methods over the traditional methods is that the images can be stored and conveniently retrieved for future use. An additional advantage of these methods is that the software program used is commercially available and a widely used image editing digital aid [1].
Abobe Photoshop is one of the excellent image editing software. Photoshop was developed in 1987 by the American brothers Thomas and John Knoll. Photoshop files have default file extension as PSD which stands for "Photoshop Document" and sometimes have the file extension PSB which stands for "Photoshop Big" for large documents. Adobe Photoshop is a raster graphics editor developed and published by Adobe Systems for macoS and Windows. Literature has discussed usage of Adobe Photoshop in various studies related to age estimation, sex determination, bite mark analysis etc. But none of these studies has elaborated how they have used Adobe Photoshop for their study. What all are the steps? This highlights the importance of this technical report.
Steps of measuring length and area in digital dental radiographs
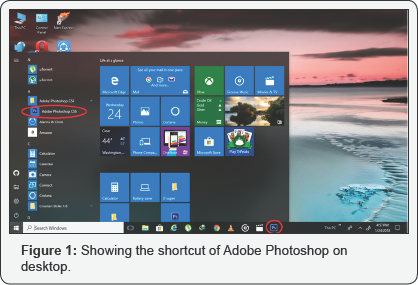
a) First of all Adobe Photoshop CS6 is installed on your PC, then you can view it under the apps (elliptical red oval) and you can also create a shortcut on desktop or pinning it to the taskbar (Oval red circle) ( Figure 1) [2].
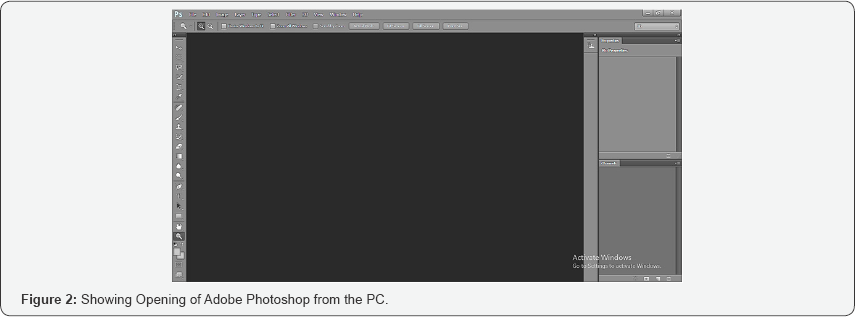
b)Open Adobe Photoshop (Figure 2).
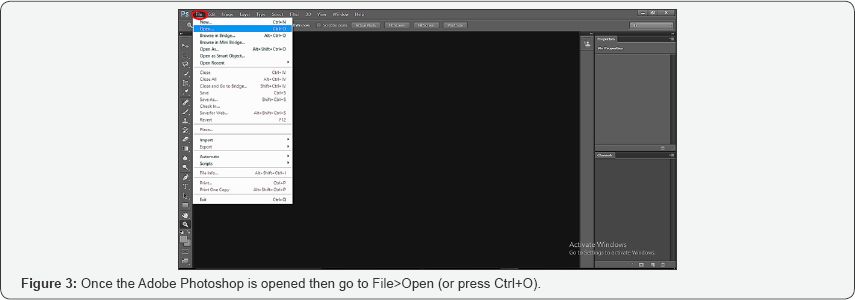
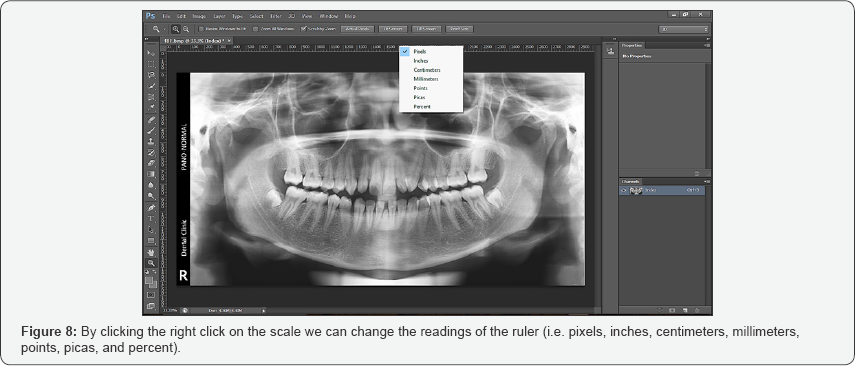
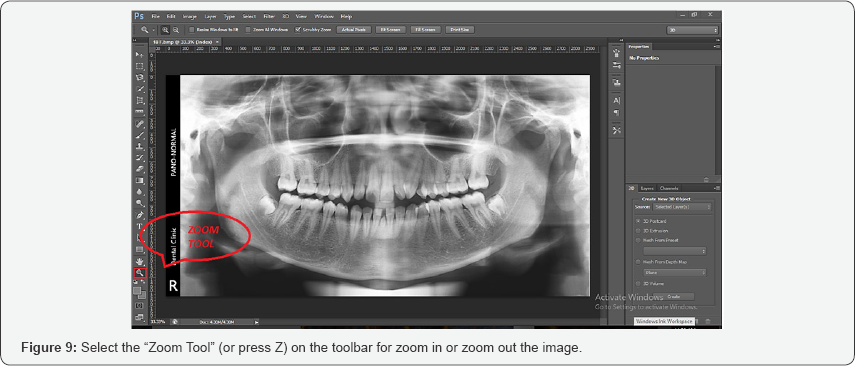
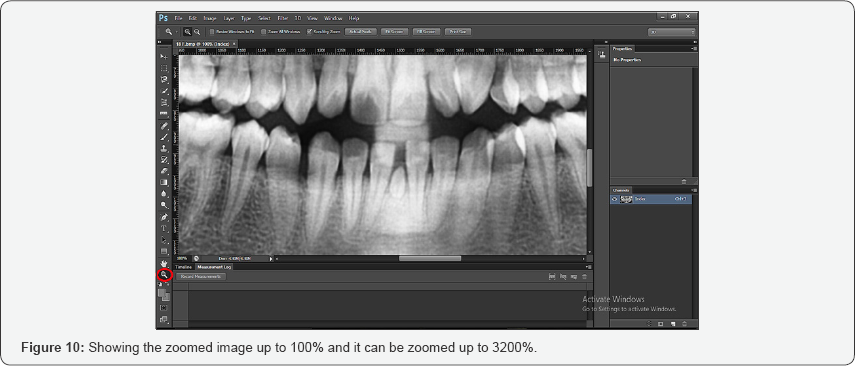
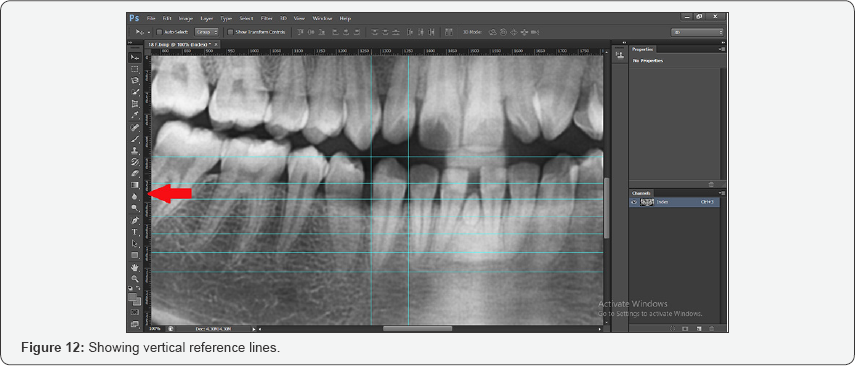
c) Then go to View>Rulers (or press Ctrl+R) for view the ruler (Figures 3-13).
For Measuring the length of the Teeth
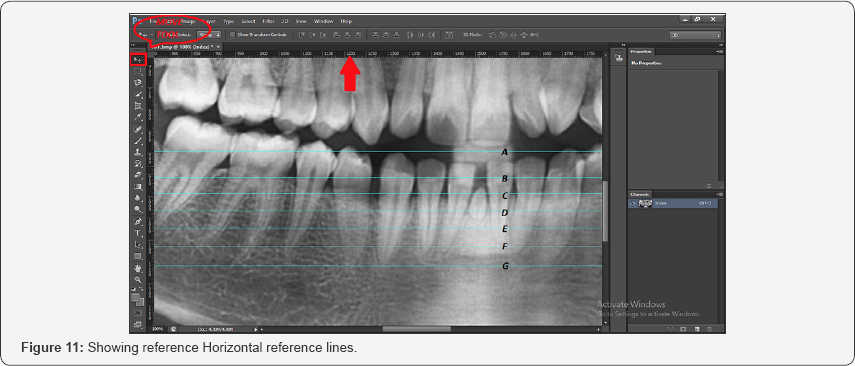
Click and drag the cursor from within the ruler (red color arrow) to create a horizontal line which is placed along the width of tooth for which we want to measure. Lines can be moved by selecting the "Move Tool" (or press V) from the toolbar. In this screenshot 6 horizontal lines i.e. A, B, C, D, E, F and G are created along the length of the mandibular canine teeth.{A-at crown height, B- at pulp height, C-at cementoenamel junction (CEJ), D-between C and E, E-at the middle of the root, F-between E and G, G-at root apex}. Every time reference line has to be set for measuring another tooth parameters.
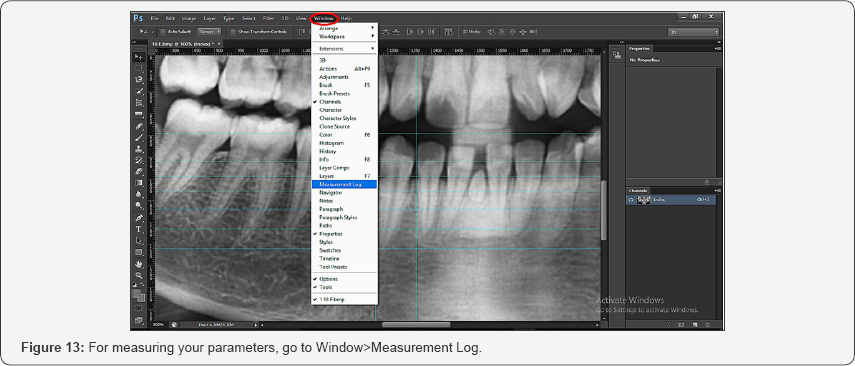
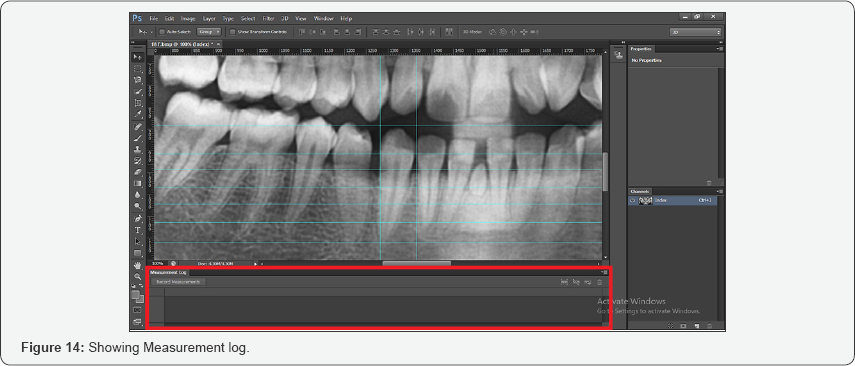
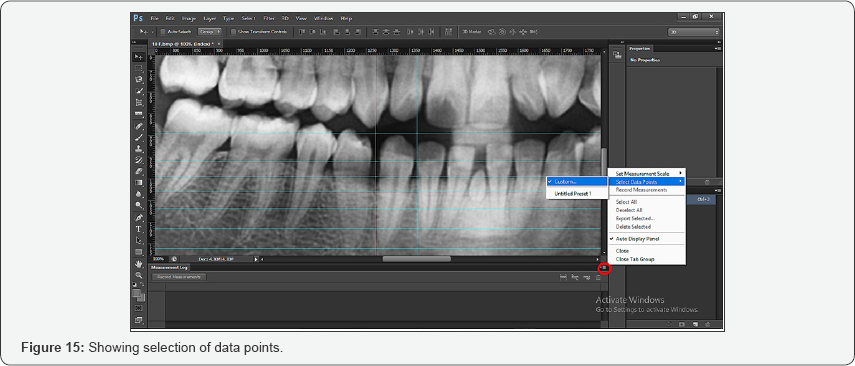
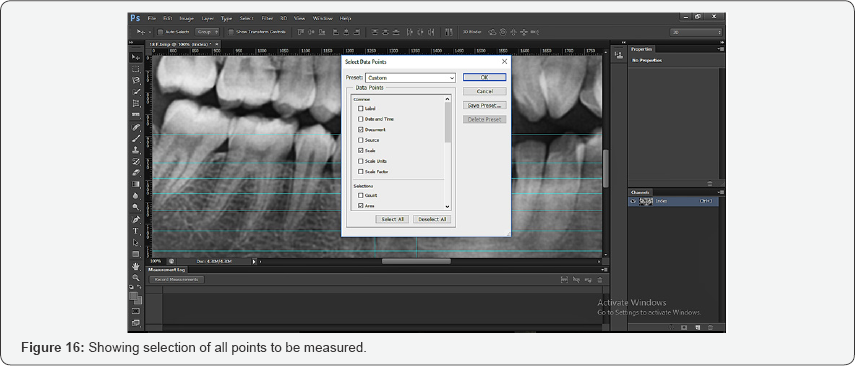
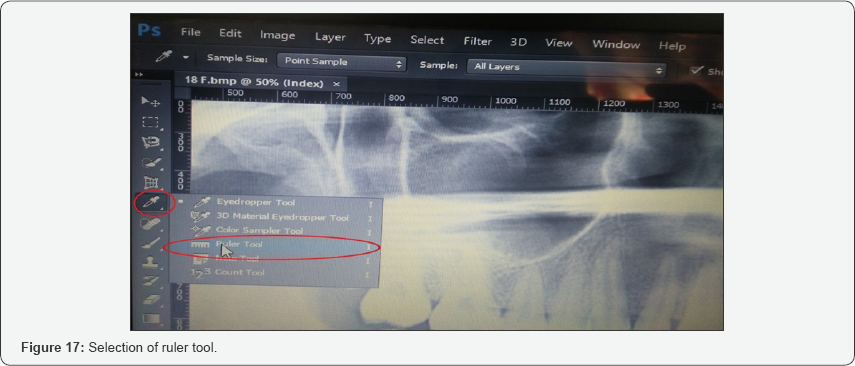
Similarly, for creating vertical line (narrow red arrow) click and drag the cursor from within the scale (Broad red colour arrow). Vertical reference lines should be placed along the tooth length whose parameters is to be measured. For measuring your parameters, go to Window>Measurement Log. Then, Measurement Log is seen in the status bar at the bottom (Figure 14). After that, click the symbol (marked with red colour circle). Then select the Select Data Points>Custom (Figure 15). From the "Select Data Points" select length, document, scale and area or select all. Then Press" OK" (Figure 16) Select the "Ruler Tool" from the toolbar (Figure 17).
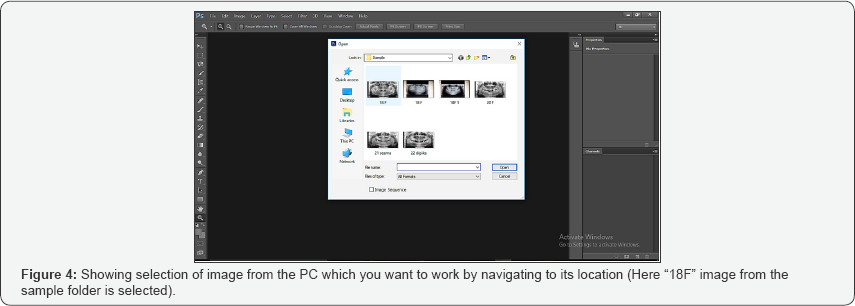
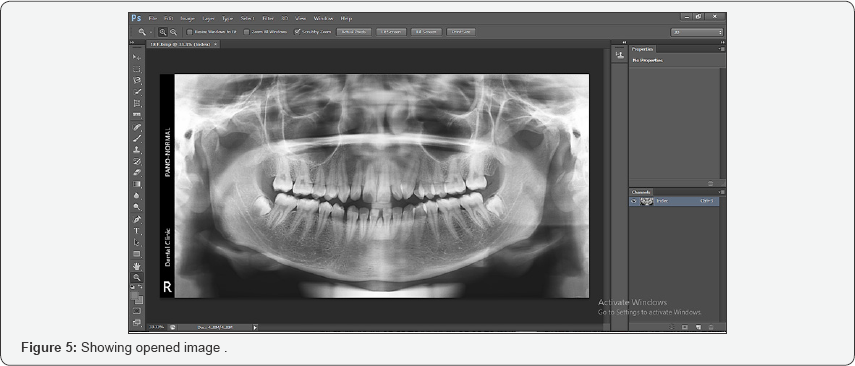
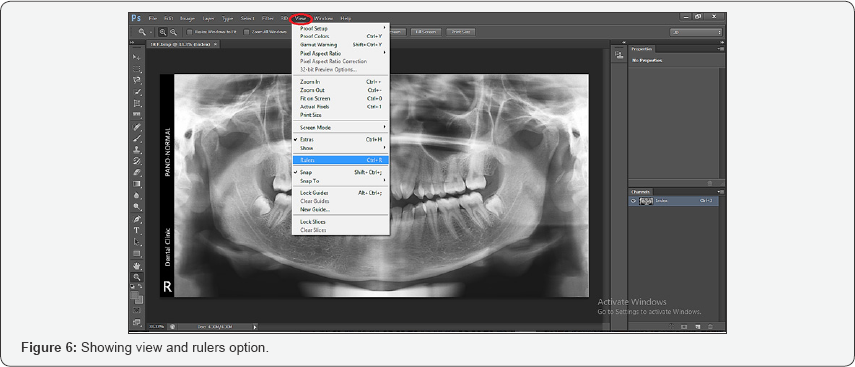
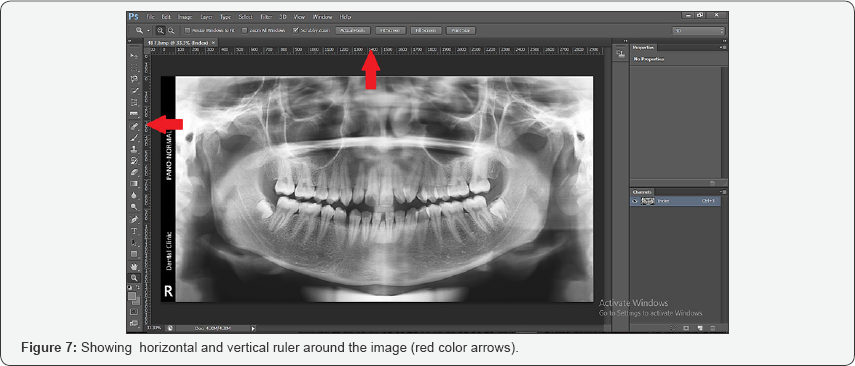
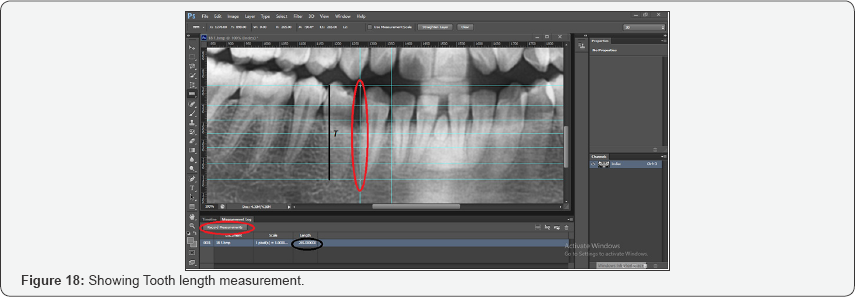
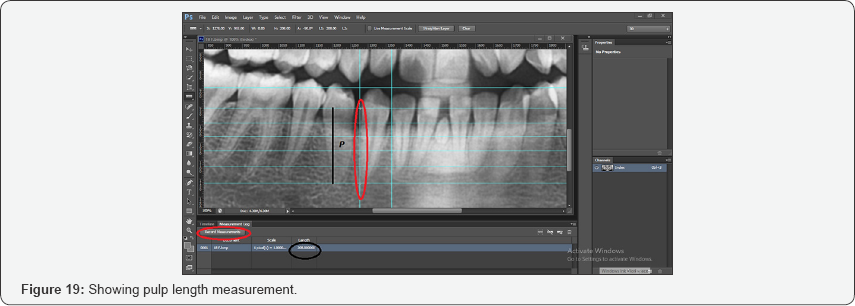
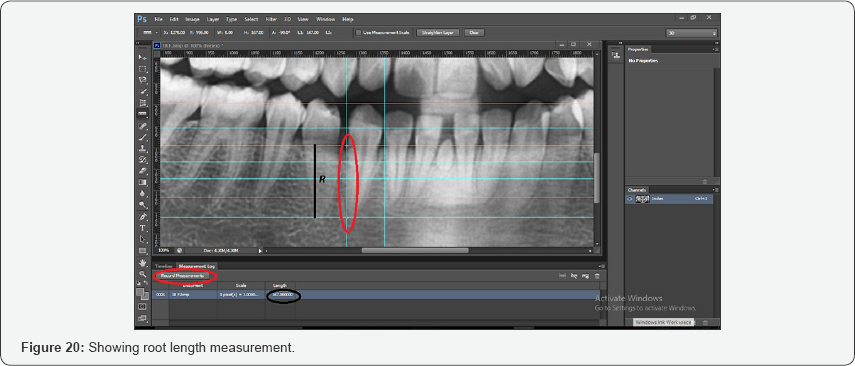
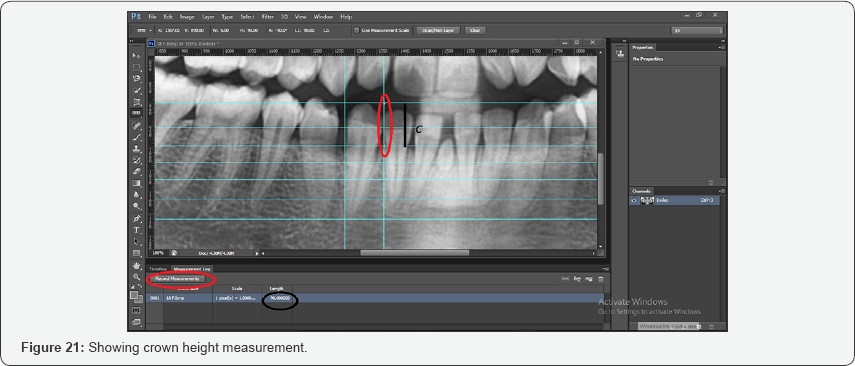
Now, click and drag the cursor pointer to draw a line on the vertical line for measuring the tooth length. Then click on "Record Measurements" and note down the tooth length from the status bar (black color oval in the bottom of the screenshot) which is 265 (Figure 18). Similarly, click and drag the cursor pointer along the pulp length and click "Record Measurements" then, note down the pulp length which is 208pixels (Figure 19). For the root length click and drag the cursor pointer along it and click "Record Measurements" and note down the length which is 167pixels (Figure 20) Same for the crown length measurement and note down the length which is 98pixels (Figure 21).
For Measuring the Area of the Tooth And Pulp
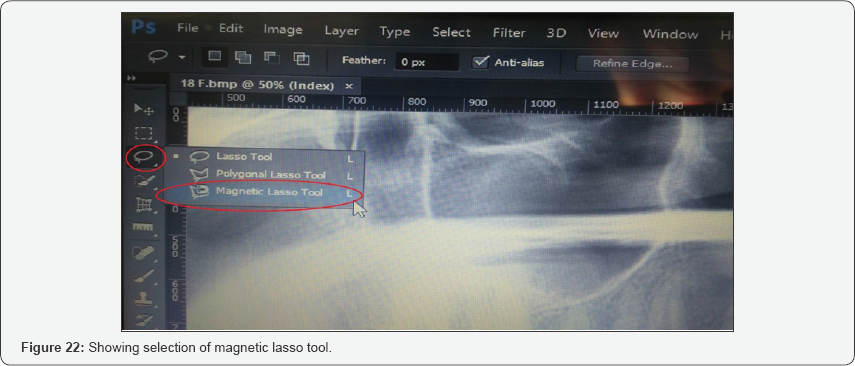
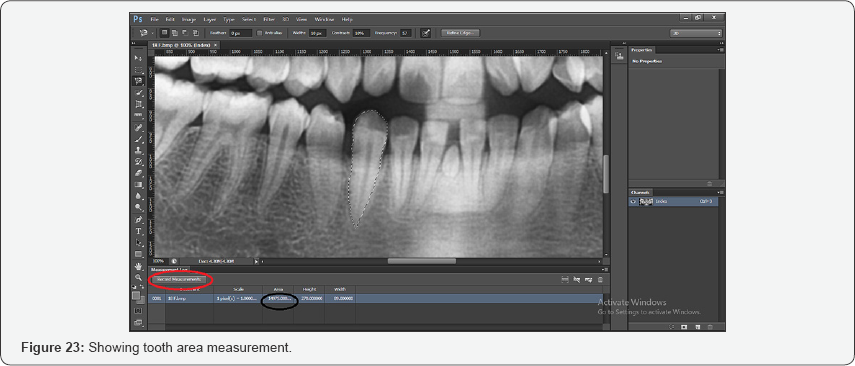
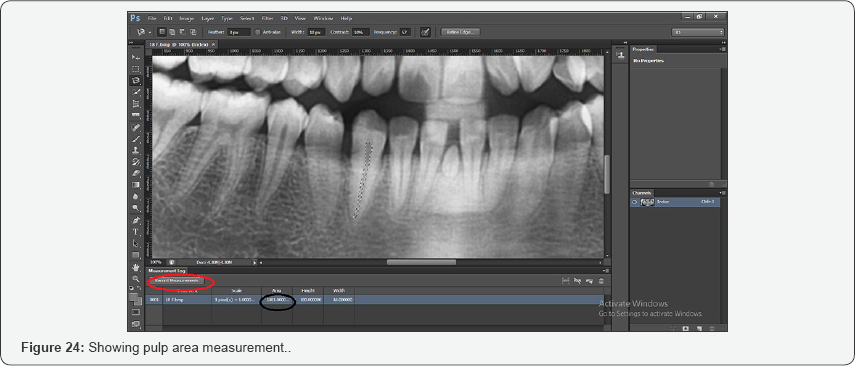
When the desired image is opened (here, "18F" from the sample folder), click on the "magnetic lasso tool" from the toolbar 9 (Figure 22). Using the cursor click and draw an outline along the teeth of interest. Carefully click the cursor along the teeth and return to the point of origin to complete the selection.Then, click on the "Record Measurements" and note down the area of the teeth which is 14975 pixels (Figure 23). Similarly, using the cursor click and draw an outline along the pulp of interest. Carefully click the cursor along the teeth pulp and return to the point of origin to complete the selection. Then, click on the "Record Measurements" and note down the area of the pulp which is 1481 (Figure 24).
Conclusion
This technical note concludes that Adobe Photoshop CS6 has the potential to serve as a remarkable tool in the armamentarium of dentists involved in routine or occasional forensic dentistry casework.
Financial Support and Sponsorship
The financial support provided by UGC, New Delhi in the form of 'UGC-JRF Fellowship' (Letter No F.15-9 (JUNE 2014)/2014(NET), helped the author in preparation of this technical report.
References
- 1. Acharya AB (2010) A new digital approach for measuring dentin translucency in forensic age estimation. Am J Forensic Med Pathol 31: 133-137.
- Acharya AB (2017) The versatile use of free-to-download and open access computer software in forensic odontology casework. J Forensic Odontostomatology 35: 10-11.


